
1.3. Build and deploy environments
The architecture of our Webapp follows the client-server model. So, we use:
- Angular 5 framework for the client.
- Nodejs for the server.
According to this, different commands will be used to perform the build and deploy tasks of each of the environments.
"scripts": {
    "ng": "ng",
    "start": "ng serve",
    "startLocal": "ng serve --env=local",
    "build": "ng build --env=local",
    "buildDev": "ng build --env=dev",
    "buildStaging": "ng build --env=test",
    "buildProd": "ng build --env=prod",
    "test": "ng test",
    "lint": "ng lint",
    "e2e": "ng e2e"
  }
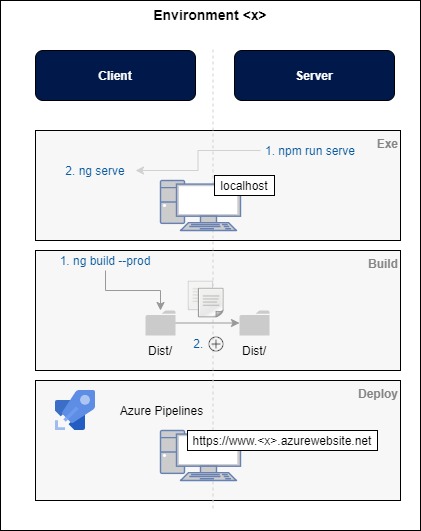
The following image shows a scheme with the steps to perform the different tasks ( execution, build and deploy) in a particular environment, “x”.
As we are working with gitflow each branch of the repository corresponds to a specific environment and therefore a different script will be added to perform these tasks on each of the environments.
In this section we will explain the procedure to follow to perform each of these tasks. Therefore, the following section has been divided into sections to detail the specific steps for each of them.
1.3.1. Execution.
To run one of the application environments on our machine and be able to perform the implementation and testing tasks, based on the technologies chosen in our client-server model, we have to perform the following steps:
- The server is designed in nodejs v10.16.3, so it will be executed from the node console with the corresponding command.
- As the client is designed in Angular 5, we will use Angular Cli executing the corresponding script.
So, the first thing to do is to launch the server with “npm run serve”.
Then, we will see how to launch the client. To do this, first it is necessary to understand the configuration and architecture of the workspace of Angular’s projects. In the file package.json we will find the different scripts that have been designed to perform different tasks on the project, such as: the execution, the testing or the build of it.
In this case, to execute the client of our application we use the command: ng serve.
With this, we will have the Health29 application running at http://localhost:4200/.
To execute the application of each of the available environments, it will be enough to checkout the corresponding branch. This will work on the code of that branch and therefore what will be deployed in the corresponding environment.
1.3.2. Build: scripts.
The build is done on the Angular client. As seen in the previous sections, using the scripts defined in the package.json file, we could build and deploy the application from local memory. But when we are ready to deploy in a environment, we must use the ng build corresponding command to build the app and deploy the build artifacts elsewhere.
So that, for each environment we must use:
- Local environment: “npm run build”. For that use the code that you want.
- Development environment: “npm run buildDev”. For that use the code of develop branch.
- Test enviroment: “npm run buildStaging”. For that use the code of release branch.
- Production environment: “npm run buildProd”. For that use the code of main branch.
Both ng build and ng serve clear the output folder before they build the project, but only the ng build command writes the generated build artifacts to the output folder.
The output folder is dist/project-name/ by default. To output to a different folder, change the outputPath in angular.json.
As we saw in the diagram shown at the beginning of this section, by runningnpm run buildX we minimize and compress the code. This command will create a new folder called dist, and it will have the project optimized. This dist folder will be the one uploaded to the root of the node server that manages the API. It will also be used to create the mobile apps, adding it to the www folder of the cordoba project.
1.3.3. Deploy.
The deploy tasks can be executed according to gitflow structure of the project. That is, you can configure the listening of the push or commits in each branch of the project according to a specific environment to automate the deploy of this environment.According to the build that has been executed, a different dist folder will be generated and used by the server. In addition to this, the “config.js” file has to be modified to match the secrets or keys of the corresponding environment.
As our server is created in node.js we can use Azure Pipelines for deploy our App Service. This configuration is explained in the next section.
1.3.4. Semiutomation of processes: Azure Pipelines.
To deploy one of the environments, we could use Azure Pipelines.
The architecture proposed consists of the construction of CI/CD pipelines which helps you automate steps in your software delivery process, such as initiating code builds, running automated tests, and deploying to a staging or production environment. Automated pipelines remove manual errors, provide standardized development feedback loops and enable fast product iterations.
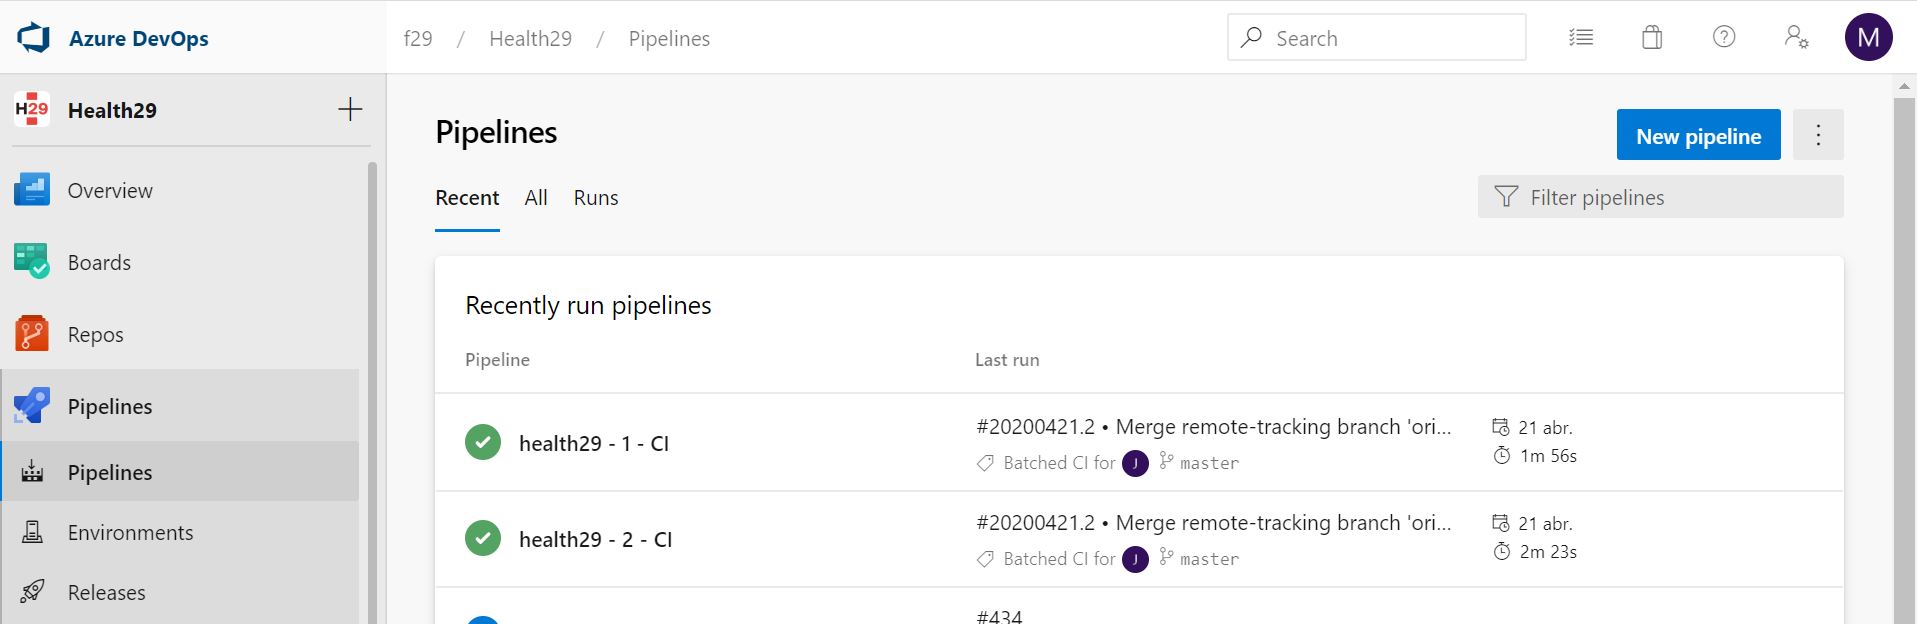
Thus, the corresponding pipelines for build and deploy the environment with the changes made should be executed according to gitflow. That is, we have 6 pipelines available in the project: one for the client and one for the server, of develop, test and production environments.
The deployment of the development and test environments will be automatic, so that the pipelines will have the Trigger parameters configured to be launched automatically when a push is made on the corresponding branches. While the production environment will be launched manually to prevent possible errors as it is a critical task.
For convenience, both build and deploy tasks have been added to these pipelines. In this way, when you want to update any of the environments, you only need to execute the client and server pipelines, in that order. It is important to respect the order since when the build tasks are included, as indicated in the previous sections, it will be necessary to update the node server root with the content of the last client compilation.
It is important to emphasize here that the title of the section indicated that we make a semiautomation of the processes, this is due to the fact that the execution of the production pipelines is manual.
1.3.4.1. Setup Azure Pipelines.
Starting from an azure app service and an azure devops project created, the pipelines are implemented as explained in this document with some modifications since, as we have said, the execution of the production pipelines will be manual.
1.3.4.1.1. Pipeline for Server code
Access Azure/ App Service/app service name/Deployment slots:

Select the slot you are going to work on. Go to deployment center (if the slot was already deployed, click on disconnect):
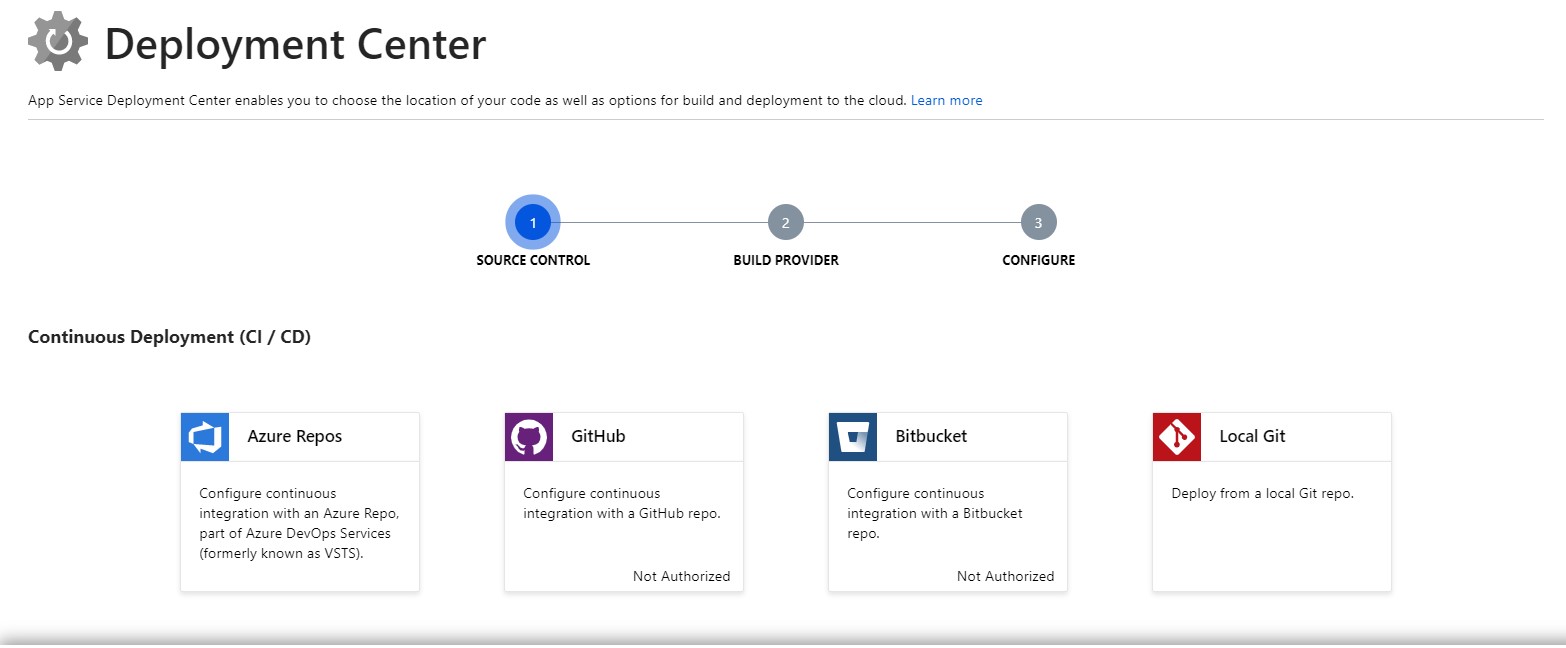
Click on azure repos
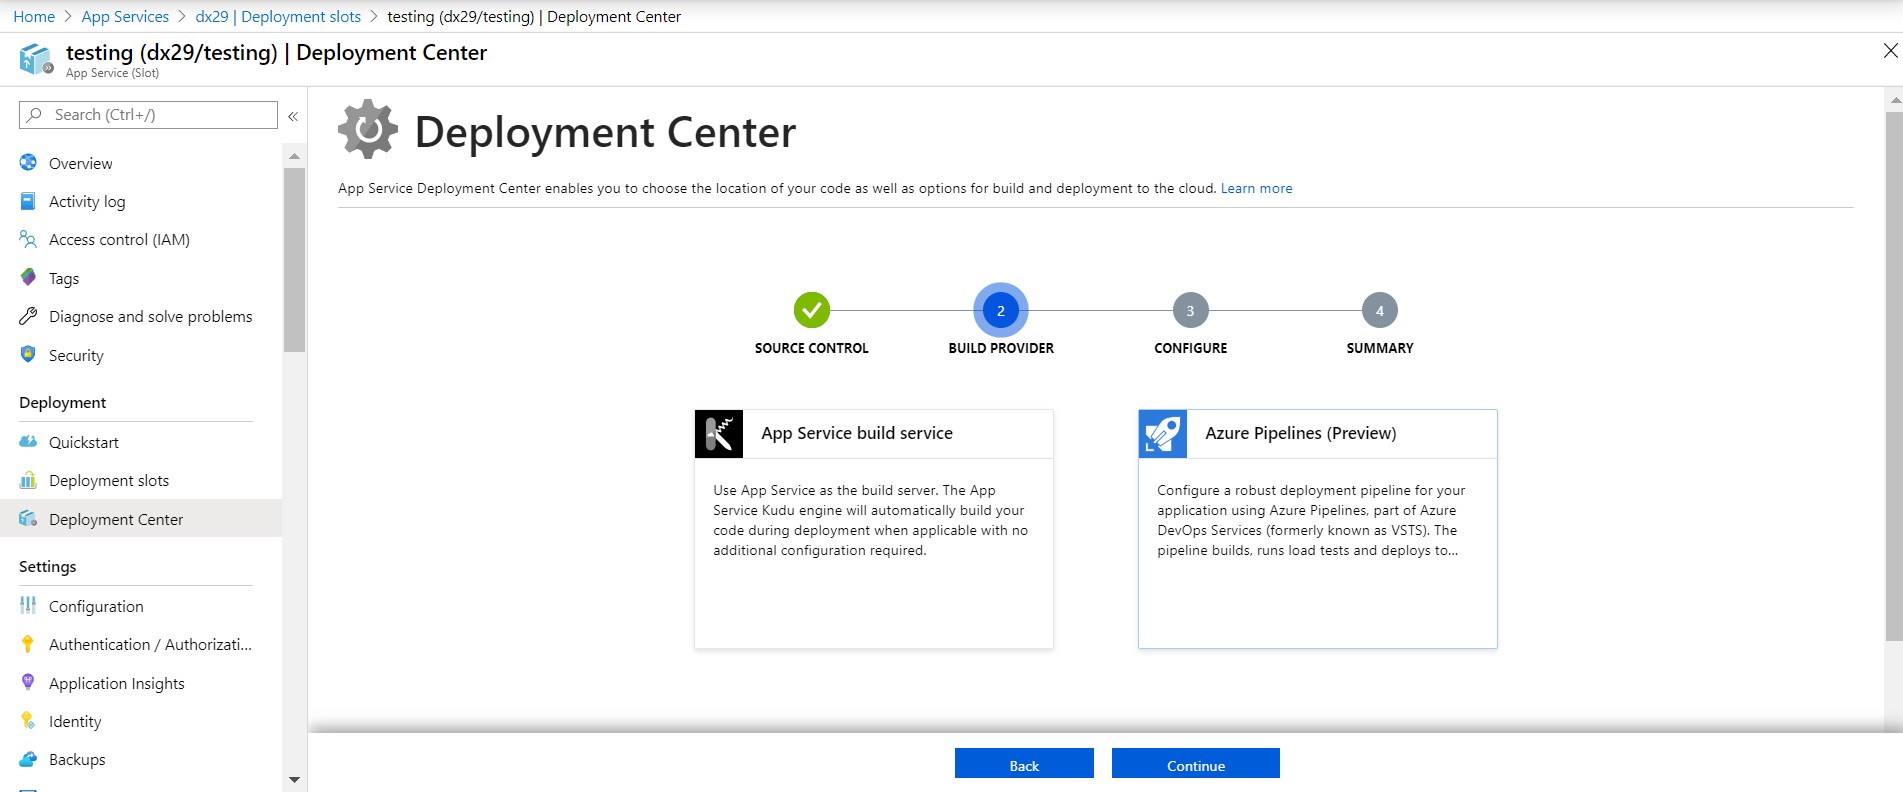
Select azure pipelines and configure and finish. Now go to azure devops/pipelines. A new pipeline should be created and we must replace the content of the /dist folder by the last compiled version of the client
1.3.4.1.2. Pipeline for Client code
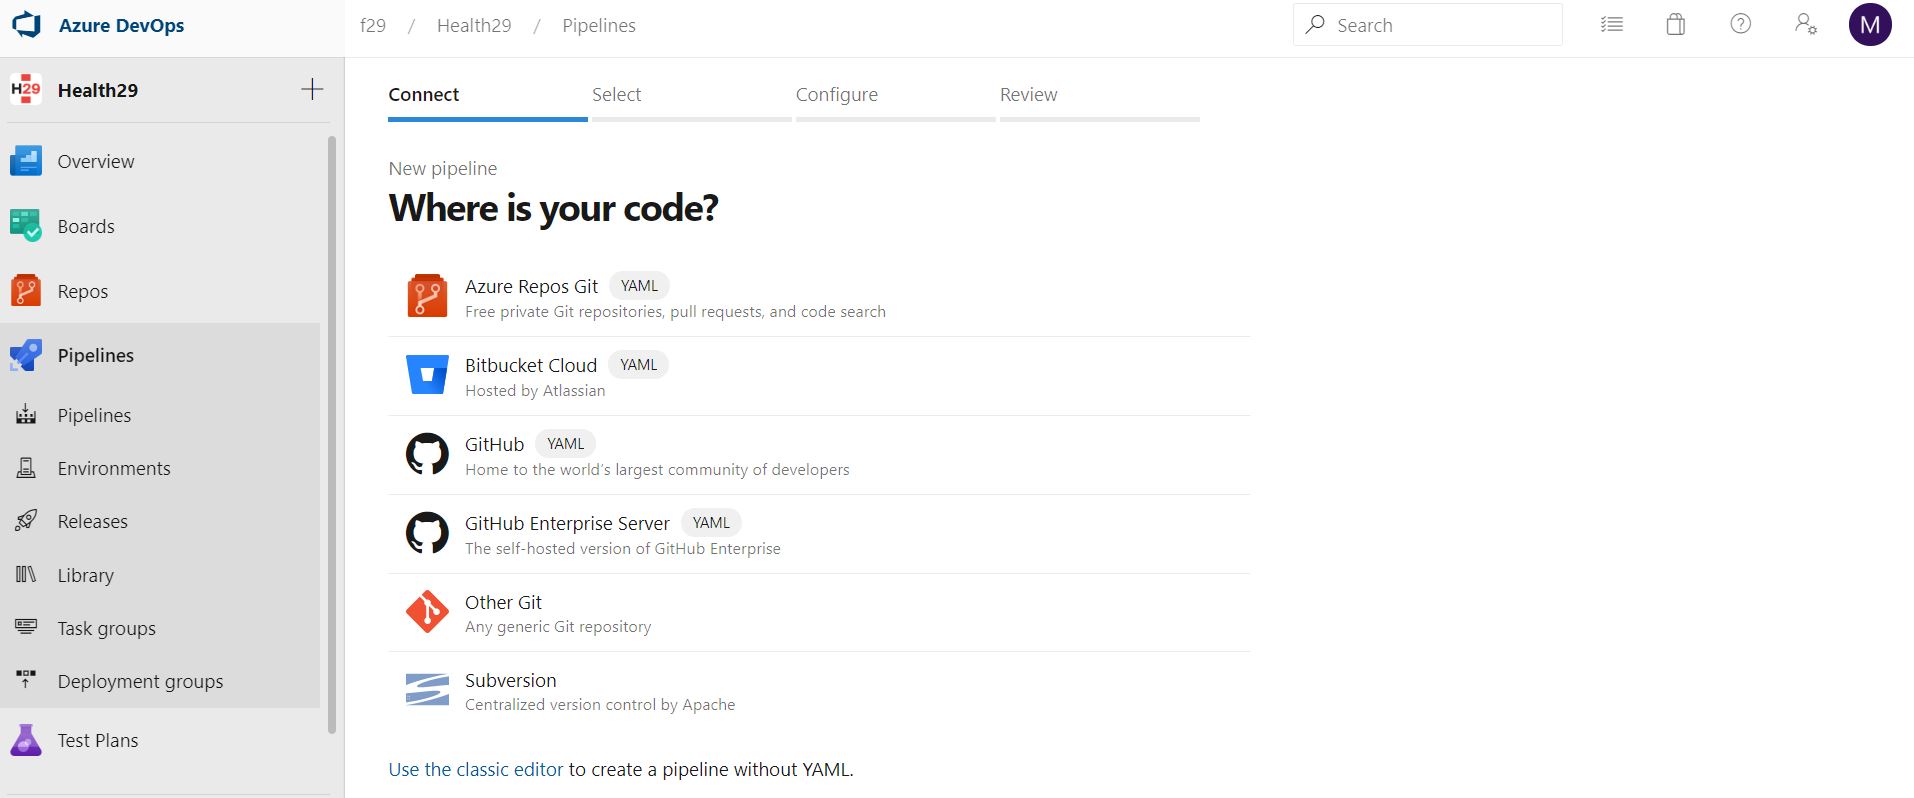
Go to Azure DevOps. In the left navigation, select ‘Pipelines’. Then click ‘Builds’. Now you can see, ‘+ New’ drop down. Click it and in the list, select ‘New build pipeline’.
Then it will take you to select the repository, where your project is hosted (Github option). Here select ‘Use the Classic Editor’.
Then after, you will take to select the Project, and the Branch, which the build pipeline works on.
Next it asks to select template. Select, ‘Empty Job’.
Now you can see the screen, where you have to say the steps to take, to build the project. And with this we would have the Pipeline created. Now we have to add Task to perform the different functions that we want to execute in the call to this Pipeline.
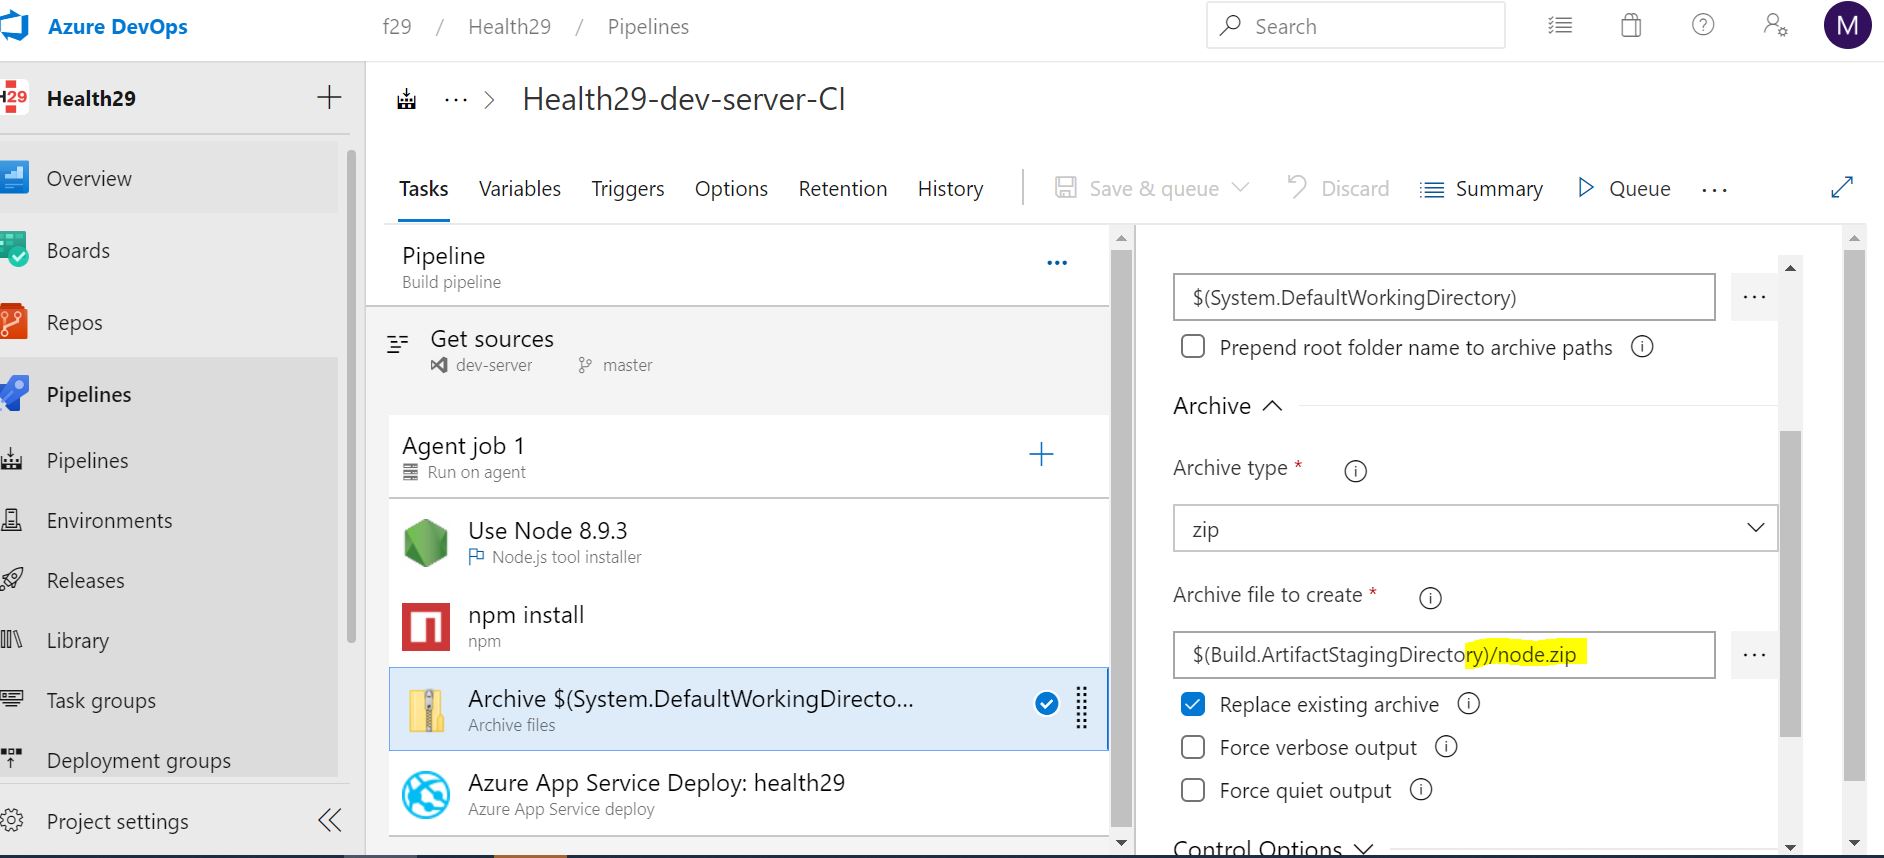
In general, the first thing to do is to indicate that we are going to use Node and its version and download all the libraries we need:
- Install Node: Type: ‘Node.js’ in the Search box. Select Node.js tool installer and configure it with selecting a version (We will use 8.9.3 version of Node.js)
- When we have installed Node.js we can use the commands. So, type ‘npm’, in the Search box. Add ‘npm’. Then you can see the panel, where you can define the Task.
- Display Name — Name of the Task. ( Display Purpose)
- Command — What the task has to do. ( install = npm install, custom = customized command )
- Working folder that contains package.json — Where is package.json is located. ( you can locate to package.json by clicking …. in the right side )
- The commands we’ll use are Angular CLI 5 installation and the Angular packs (node modules)
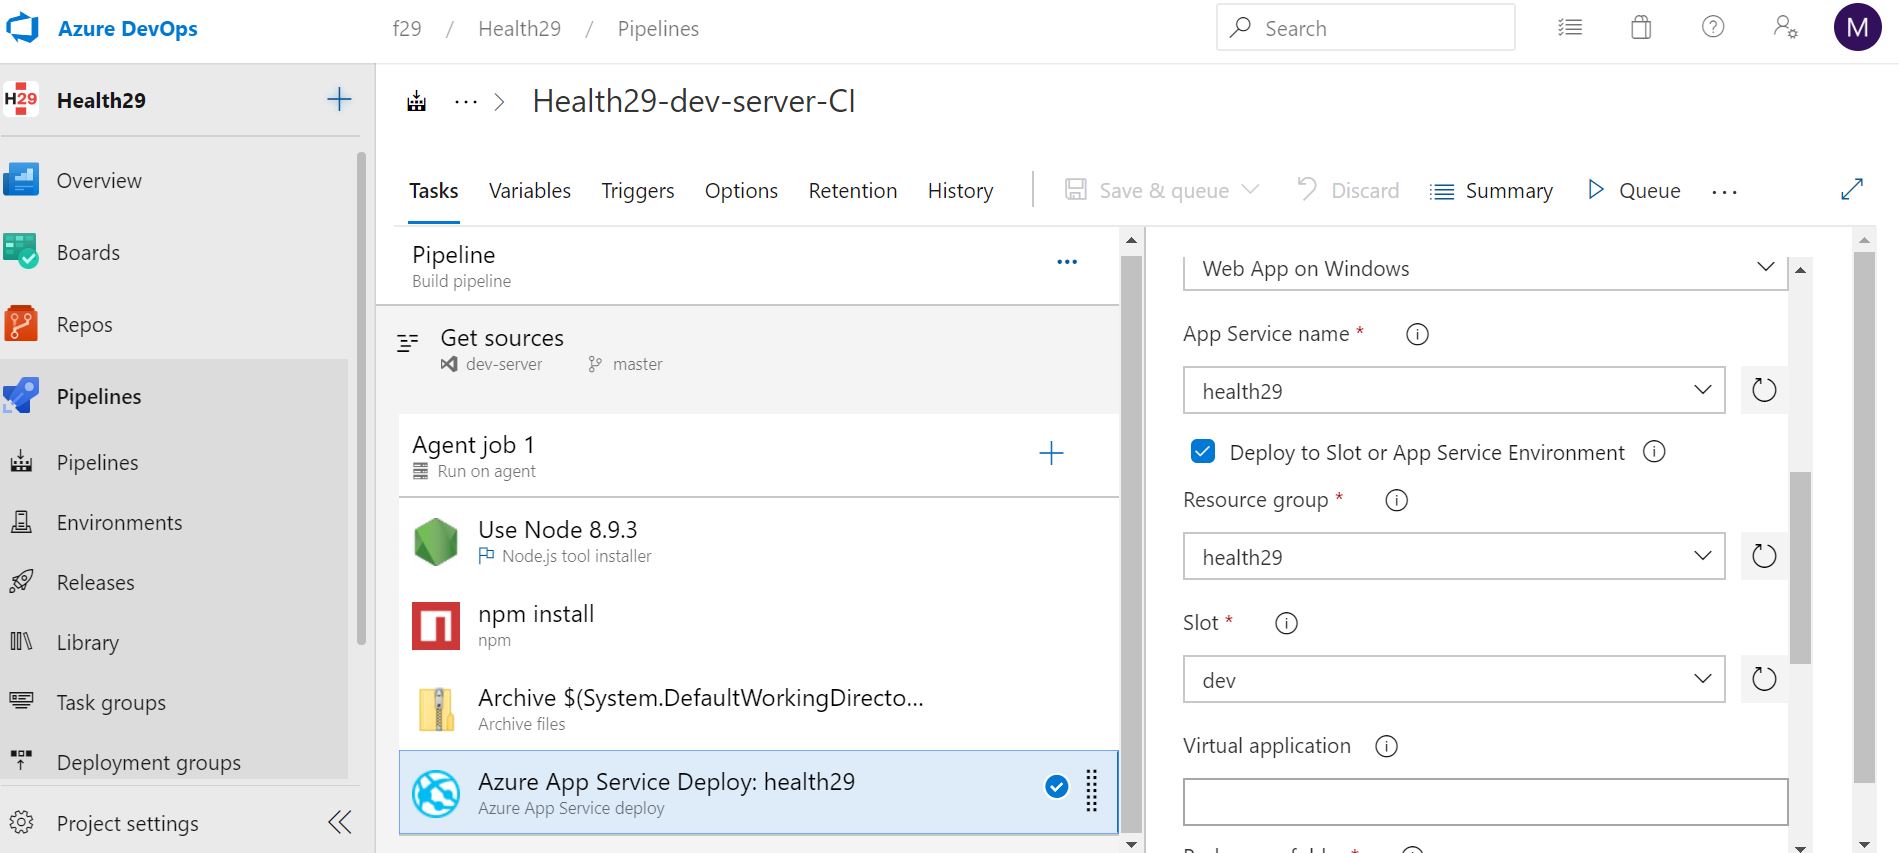
The next steps would be to include the Tasks with the functions we want to perform during the Pipeline execution. In our case: build and deploy tasks. The build command is executed by calling the corresponding script that has been programmed in the client code for each environment. In this case, since the client is programmed in Angular, this is defined in the package.json file.
And this script will execute the “ng build” command configured for the project environment (in environment folder). The task of deploy will be to save the contents of the dist folder that has been generated after the client build. This is the one that will be included later in the server to make the environment deploy.
1.3.5. Keys and secrets for each environment.
1.3.5.1. Health29 client.
1.3.5.1.1. Secret keys.
This project uses external services. For each of the environments it will be necessary to configure the value of the secret keys to connect with the different APIs.
As it is an Angular application, for the project to be compiled and executed it is necessary for the environments files to exist (at least environment.ts).
To be able to compile and execute this project you have to modify the extension of the src/environments files, removing “.sample” (for example, you have to modify environments.ts.sample by environments.ts) and here complete the information of the secret keys of the services.
As a minimum, it is mandatory to perform these actions on the environment.ts file (to work locally) in order to compile and run the platform. If you want to use any of the other environments, it is also essential that this file has been modified in addition to the one corresponding to the environment on which you want to work.
1.3.5.1.2. Environment deployment – Azure pipelines.
For the continuous deployment we use the Azure Devops Pipelines, which must be configured to do this task automatically and to be able to execute the complication and the deploy of the application correctly. For this purpose, we have uploaded the environment files with the values for Foundation29 to Azure Devops: Pipelines/Library, as secure files.
In the pipelines, prior to the server’s build, the following tasks have been added: Download secure file and Copy files, in each case downloading and copying to the destination folder (src/environments) the files: environment.ts and the one corresponding to the environment that manages the pipeline (dev, staging or prod).
In the same way, the tasks to modify the README.md file to include the information about the pipeline execution state (badges) have been implemented in the pipelines (according to the environment they are stored as secure files). For this purpose, the “Download secure file” task has been used again. However, in this case the Powershell “Move-Item” command has been used because besides copying the file you also want to rename it (in each branch or environment there has to be a file with the name README.md). Finally, the git actions are executed on the command line to update the repository with these changes.
NOTE: This is done in the pipeline, otherwise every time you change the environment (from dev to test or from test to prod) you would have to manually update the README.md file because it would be crushed with the previous environment.
1.3.5.2. Health29 server.
1.3.5.2.1. Secret keys.
This project uses external services. In this case it is a project in node.js, where the file containing the information of the secret keys to connect to the different APIs is config.js. As with the client, we have chosen to create a config.js.sample file with the indications to complete the necessary information to compile and execute the project.
As a minimun, for local develop it is mandatory to configure the file config.js.sample. So, to be able to compile and execute this project you have to modify the extension of the config.js.sample file, removing “.sample” (you have to modify config.js.sample by config.js) and here complete the information of the secret keys of the services. If you want to deploy on each environment you must configure in the Azure App Service slot in Configuration/Aplication settings the variables defined in config.js file.
1.3.5.2.2. Environment deployment – Azure pipelines.
For the continuous deployment we use the Azure Devops Pipelines, which must be configured to do this task automatically and to be able to execute the complication and the deploy of the application correctly. For this purpose, we have uploaded the config.js file with the values for Foundation29 to Azure Devops: Pipelines/Library, as secure file.
In the pipelines, prior to the server’s build, the following tasks have been added: Download secure file and Copy files.
In the same way, the tasks to modify the README.md file to include the information about the pipeline execution state (badges) have been implemented in the pipelines (according to the environment they are stored as secure files). For this purpose, the “Download secure file” task has been used again. However, in this case the Powershell “Move-Item” command has been used because besides copying the file you also want to rename it (in each branch or environment there has to be a file with the name README.md). Finally, the git actions are executed on the command line to update the repository with these changes.